Templates
A template is one of Momento’s four auto-layout options. Templates are stylish, pre-designed page layouts that can be filled with your own photos to create a truly professional looking photobook. Unlike the Quickbooks auto-layout option, templates do not include backgrounds, frames or embellishments.
Accessing Templates
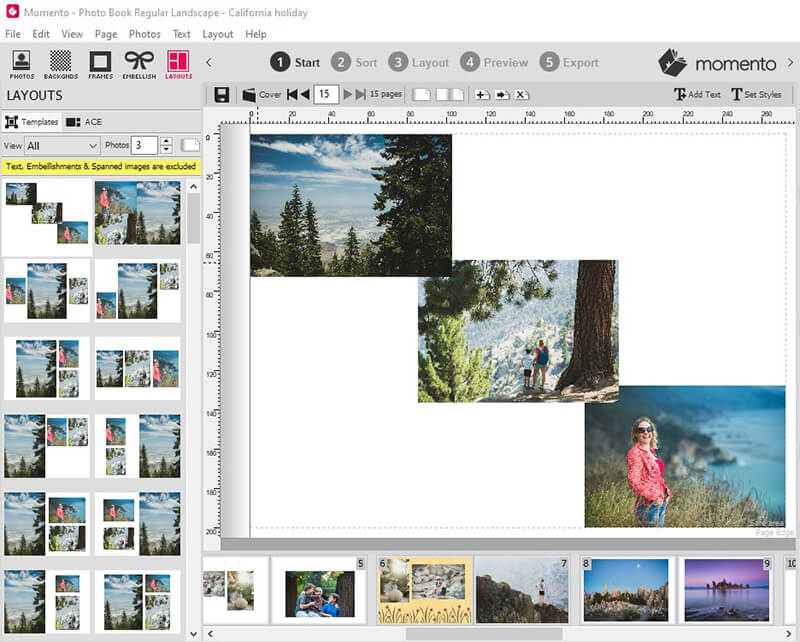
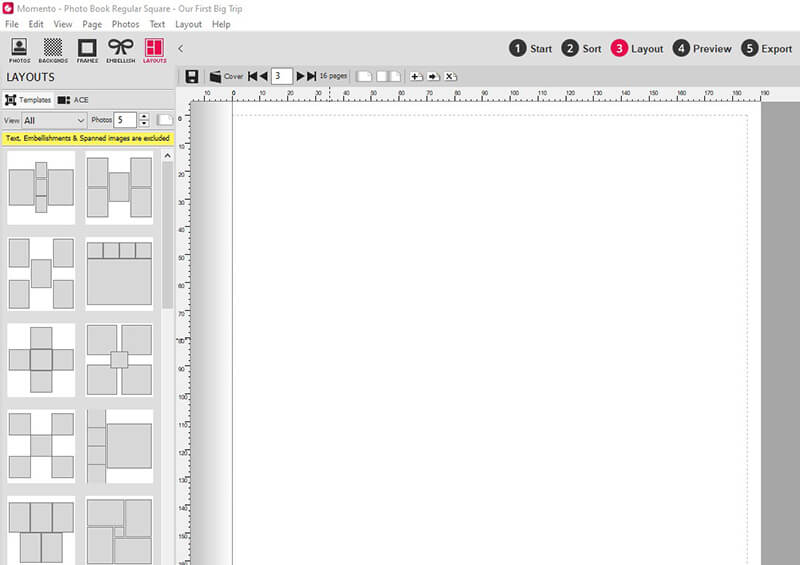
Templates can be viewed in a list of small thumbnail images in the Layouts Panel when you are in Layout View or Cover View.
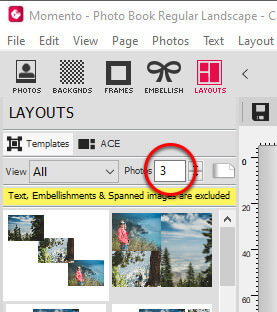
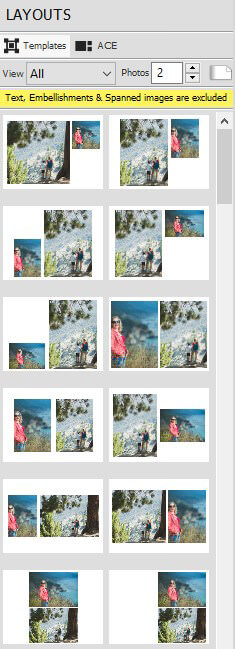
The Templates Panel will show a different range of layouts depending on the settings you select in the View drop down menu and Photos number field at the top of the panel. You can choose to view templates with:
- the same number of photos as the number on your page design by not changing any settings
- any number of photos by changing the number in the Photos field
- a specific design theme i.e. 70s, Easter, Wedding, by selecting from the View drop down menu
Template preview with your photos
The software is smart enough to use the same three photos from your page design in the template thumbnail views so you can see exactly what the layout will look like before you drag it on to the page.
Mirror option

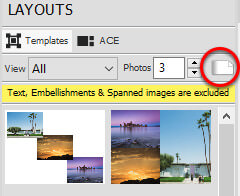
There is a Mirror option in the Templates Panel that allows you to select a Template and flip its design horizontally by 180°. Click the Mirror button and each layout will flip and show the format the image from right-to-left rather than left-to-right (or vice versa). Click the Mirror icon at the top of the Templates Panel and all Templates will be shown with their layouts reversed (mirrored).

Use a Template
Apply a Template to an existing page
If you are working on an existing page design that has three photos on the page, you can click on the Layouts Panel button > Templates button and the Templates Panel will only display layouts that include exactly three photos. Browse up and down the Templates Panel to view all the options before selecting and dragging your preferred template on to the page or double click on it. Your page will take on the layout of your chosen template.
.jpg)
Edit a Template
It is easy to edit a template design just as you would any other page of your design. You can delete elements you don’t like, you can swap the position of the photos, you can change the colour of the background or any other change you wish by using all the standard editing features. Remember! You don’t have to use the templates as your final layout - you can simply use them to get you inspired!
Apply a Template to a blank page
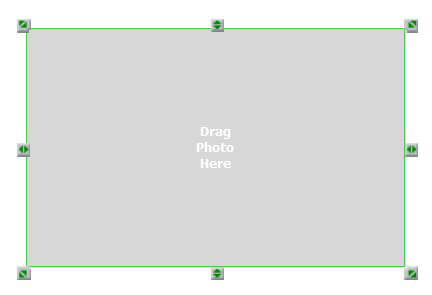
To add Template to a blank page, double-click or drag the template on to the page and the page will take on the template layout but instead of including photos you will see several grey boxes containing the words Drag Photo Here. These grey boxes are called placeholders and you can now drag any photo into the placeholder.
Placeholders
A placeholder is the grey box visible in a template, with the label Drag Photo Here. You can easily drag a photo in to the placeholder to create your page design.
Deleting a Placeholder
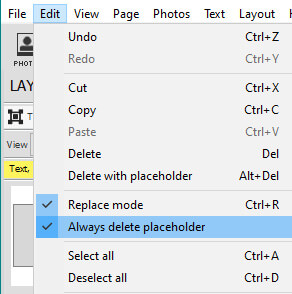
You can always delete an empty placeholder by using the Delete button. There is also another delete option for placeholders in the Momento software. By default, every photo added to a Momento project also comes with a placeholder that ‘sits under’ the photo and by default whenever a photo is deleted so is its placeholder. But! You can choose to change the setting so that when you delete a photo the placeholder is not deleted. You can use this function if you love your page design and you want to use it again. By default, when you Save A Template, it removes the photos and keeps the placeholders.
To leave a placeholder behind when deleting a photo, go to the Edit Menu and clear the Always Delete Placeholder check box. Deleting the photo but keeping the placeholder will allow you to simply drop a new photo on to the placeholder. This can be a great time-saver.
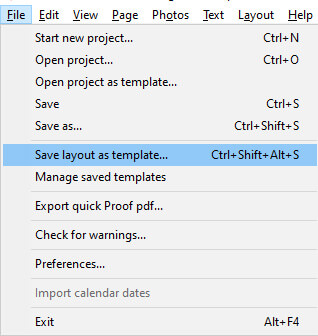
Save your own Template
You can easily save your favourite page designs as your own template with placeholders or photos, or a combination of both. Simply use the Save Layout As Template option in the File Menu and the Save Template Box will open and you can make some choices about how your template is saved.
You have a number of options when saving my own Template.
.jpg)
- Type a name for your template in to the Name field
- If you want your template to be saved with the current photos in it, tick the first check box
- If you do not check the first box, your template will be saved with placeholders instead of photos
- If you want your template to be saved with the current text in it, tick the second check box
- If you check the second check box a third option will become available
- If you want your text to be saved with "Type text here" rather than the actual text entered in the design, check the last box
- The template will now be saved and will appear in the Templates Panel when you select Saved from the View drop down list
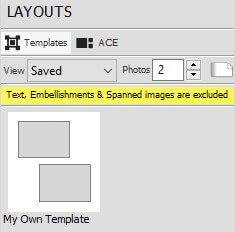
To access Saved Templates
Any template design you have created will be accessible via the Templates Panel when you select Saved from the View drop down list.
You can also use Templates with a combination of photos and placeholders when you are working on an existing page design that has photos on it already. Let’s say you have three photos on your page and you go to the Templates Panel to view what auto-layout options are available. The Photos number field will automatically show 3 photos per page. If you change the number of photos you want to see per page from 3 to 5, the panel will update to show templates that include 5 images - your 3 photos and 2 placeholders. When you drag one of these template on to your page, you can drag and drop photos in to the 2 place-holders.
To save a Multi-Page Template
To save your own multi-page photobook Template use the Open Project as Template option in the File menu. Your existing book will open with the same layout but without photos in it. This is a great time-saving technique for books that you create many times a year or for different people. Have a go and have some fun with this one.
Image Credits: Heartstory